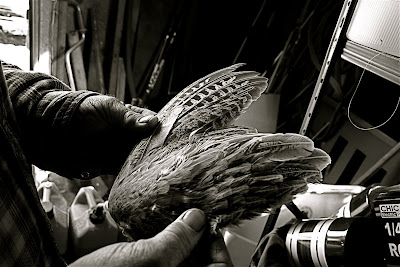
For this week I'd like to concentrate on creating digital black and white photos. Part 1 of the lesson consists of me scouring the internets for tips about digital black and white photography and compiling the bits I saw repeated as important. Below you will find my list of "5 Tips for Great Black and White (Digital) Photography To Add To the Multitude of Lists Already Out There." Also, if you want to check out some really beautiful B&W shots go here.
So without further ado...
5 Tips for Great Black and White (Digital) Photography To Add To the Multitude of Lists Already Out There.
SHOOT IN COLOR: This may seem counterintuitive if your camera has the option of shooting in black & white, however, you will have greater control of your final product if you shoot in color and then convert to black & white in post-processing. One thing to note is that your camera may give you the choice to preview your scene in black & white on your LCD screen. This might help you to identify good black and white scenes, just make sure to switch back over to color capture once you are ready to shoot your final image.
SHOOT IN RAW: This may or may not be an option for you depending of the type of camera you have. If your camera will not shoot RAW images, go ahead and keep the rest of these tenets mentioned here in mind while composing your photograph. I will be sure to cover JPEGs and RAW in LESSON #2: Post-Processing Black & White.
But if you can shoot in RAW, then do it, and this is why; every time you open and close a jpeg, they loose a little data You are degrading the color and luminosity of the pixels, which reduces the image quality. Conversely, when you shoot in RAW, a large range of possible values for color and luminosity are recorded which exponentially improves the possibility of creating a high-quality black & white in post-processing.
CONSIDER YOUR SUBJECT: Do you want to photograph a landscape, person, animal, street scene, architecture or abstract? Good! Black and white photography works well with all of these options and more. And though what you see in your viewfinder is very important for a successful picture, so are some of the things that you might not normally “see” unless you pay close attention. With a black and white photo you will want to be especially sensitive to the emotion you want to convey in the scene. Because you will not be relying on color to tell the story in your photo, you will need to take time to consider shapes, tones and textures in shot. Additionally, shadows and highlights can be very effective tools in black & white photography and if carefully considered, will accentuate textures, patterns and depth that may not be apparent when the photo is still in color.
CONTRAST IS KEY: Black & white photography encompasses black, white, and all the tones in between. Contrast and key are features you can emphasize or minimize in ways that are not really possible in color pictures. Capturing high-contrast (an extreme range between bright and dark) scenes may force the viewer’s eye to a specific part of the photograph, while a low-contrast (a more narrow brightness range) scene may suggest tranquility and calm. According to one website I found (that I can’t find again so I can’t attribute it to the guy that originally wrote this): “You may also hear the terms high key (predominately light tones) and low key (predominately dark tones) in relation to black-and-white photography. Contrast and key are not synonyms. A photograph may be low in contrast, yet high in key, such as a blond, blue-eyed girl against a white background.”
SHOOT FOR A LOW ISO: It is vital for black & white photography that you use the lowest ISO that is reasonable for the shot that you are taking, especially since this is the one key factor that you cannot change in post-processing. When you use high ISO the noise (graininess) will become more obvious in black & white than it even is in color. If you want your end product to have that grainy effect, you can add it in later, but it is best to start with as smooth of an image as is possible from the get go.
Your homework for the next couple of days is to take this list out into the world and shoot, shoot, shoot your little photo-bug heart out. Come back Wednesday(ish) for Part 2 of the lesson; Digital Black & White Photography Post-Processing.

No comments:
Post a Comment